Tuesday, February 27, 2024

Quilt Show Featured Speaker


This last weekend I had the pleasure of sharing my quilts and thoughts with our local community at the Pajaro Valley Quilt Association's 46th Annual Quilt Show held at the Santa Cruz County Fairgrounds.


As the Featured Speaker, I brought 25 additional quilts for a trunk show on Saturday afternoon and spoke for about an hour to an enthusiastic audience.  Although my expression is serious in this candid, the experience was more fun and lighthearted than it looks.  

Beforehand, volunteers helped with setup of the 14 quilts in my special exhibit and 4 on the stage. I was able to rest up before returning Friday night with hubby for the members only preview party.  This picture taken at sunset really shows the prime location of my display.


Not surprising, my BeeSewcial quilt Eyes caught the attention of many as they entered and it was the perfect chance to chat about the group, credit beemates for the collaboration and my sister for her incredible quilting.   Contraption was runner up on comments made. Many said they were reminded of art deco and Frank Lloyd Wright.  I featured many of my Aurifil Artisan challenges so that attendees could get up close to see how I used various weights in the hand-stitching, domestic machine and longarm.


Another frequent topic was QDAD, Quilt Design a Day and responding to challenges like the three minis for Curated Quilts publication and several for QuiltCon .  There were lots of familiar faces, blasts from the past, members from other guilds who took a road-trip to attend, quilters and non-quilters I hadn't met before. Having my friends and family attend meant the world to me.  

As part of promoting the event, I was interviewed by phone and provided a few pictures so I was glad to have taken some quilts in the wild shots to offer up (partial cut and paste from the online version below).   I hadn't expected to be on the front page as the cover story, so that was a nice surprise. 


The second interview was in person with a reporter and photographer and I was able to invite a couple of friends to share the spotlight which was great. 


Digital media is great but there is something nostalgic about an old school newspaper to hold in your hands.  The entire show was wonderful and I feel very fortunate to have been able to help bring attention to it.    


Wednesday, January 24, 2024

Organizational Balance


When I read the "Thread Organizing Tips and Tricks" description for our latest Aurifil Artisan challenge truth be told I cringed a little.  Let's just say that my skill in the area of neat and tidy sewing notions is not a strength.  The more I thought about it the more I wanted share a few ideas from that perspective as I'm sure I'm not alone. 


First off, Aurifil in all of its many colors and weights is a source of inspiration - Eye Candy to be enjoyed.  Although I tend to create in chaos, surrounding myself with pretty things like a vintage jar of thread, buttons and ribbons has value too.  

There is also a practical side to consider and keeping those beautiful spools safe and accessible is priority.  Because I don't want the to have the thread surface bumped around, I keep the new spools that are still wrapped securely stored this way. 


I'm a huge fan of the cone which given the size, can be a bit harder to find space for.  Lucky for me, I repurposed a CD cabinet to stack my fat quarter bundles in and realized that the shelves work nicely for cones as well.  


If you have a furry sewing sidekick use an upper shelf and put closed containers in the lower ones to make it less likely for them to help himself to your toys.  Just like fabric in my sewing room, I'm careful to limit direct sun exposure on my thread and try to avoid the damage that may be caused over time. 


When I take the open spools out and about to retreat or a workshop, I like to use something with structure to keep them from jostling in transit like this hand crafted zipper case. I’ve also received so many beautiful swaps over the years and any excuse to use and admire them is welcome. 


While working on a particular project it's smart to designate a specific container to keep the thread selection in until finished. 


Of course the very best solution for at home or away is the Thread Storage Case by Aurifil available on their website.  I've found that I can stack two small spools together and have the lid snap closed especially if they are partially used.  While I don't necessarily sort by weight or color all the time, I'm sure that is something that many makers would find useful and the color coded spools make that easy. 


For my final words of wisdom I have a tip that is organizational in  a less physical way. Photograph the spool ends with your quilt in the background and store the picture in a digital folder.  On a iPhone it’s easy to search the word “thread” if you forget this step. 

This is really useful if you need to temporarily borrow a color for another project or as reference later when auditioning what the thread looks like once stitched. 


Be sure to check out the helpful tips and tricks from the other Aurifil Artisans. 

Sunday, January 21, 2024

2023 Recap

 Before we head into a new month I want to post a brief year end recap.  Nothing represents my quilting in a nutshell more than Monthly Markers given that I choose one project worked on at that point and time as the graphic. Sometimes it’s a quilt easily recognizable and often it’s a sneak at secret sewing. 

A highlight for my creativity is always the things made and mailed off to my BeeSewcial mates in response to the prompts. You can scan back in my Instagram feed for details and descriptions of each and to see them in proper scale. 


Thankfully I’ve kept up pretty consistently adding images as I finished them to the 2023 Quilts blog page (see tab above ) . While not as prolific as 2022 it’s a nice showing of 16 and combination of quilt alongs, donated and gifted in the bunch. For non quilting items it was mainly bags and blouses. 


My Aurifil Artisan challenges can be found in depth on the blog “older posts “ and my instagram feed. 


The takeover weekend on Aurifil’s IG account was a lot of fun and much less nerve racking having done it previously. The monthly challenges continue to push me. Trying new techniques and threads is a great opportunity and having my work shared to a wider audience on their blog is an honor. 


Among the years highlights there were several shows that I shipped quilts to and a few that I attended in person. Seeing “Connections “ in the AQS printed program was a thrill. I even curated an exhibit of 40+ quilts for my guild PVQA at PIQF for the first time. 
Unlike Houston Festival where 10 members were able to travel and be together for the Quilts of Bee Sewcial, I was happy to represent solo at the Long Beach special exhibit and give a gallery talk about our quilts. 


We adopted Parker in October and although it’s nice to once again have a sewing sidekick he’s still in the puppy phase just turning a year old. Juggling quilting while keeping everything out of reach is a balancing act that we’re improving upon daily.  I’m looking forward to gather inspiration during our walks and quilting in 2024 with him as my helper. 


Saturday, January 13, 2024

Scissor Covers and 8 weight threads


The soon to be released 8 weight 2 ply cotton thread from Aurifil was a dream to experiment with.  Before becoming an Aurifil Artisan I'd really only used 40 wt and 50 wt threads and have since  played with 28 wt, 12 wt, 80 wt and monofilament too but 8 wt is all new to me.  

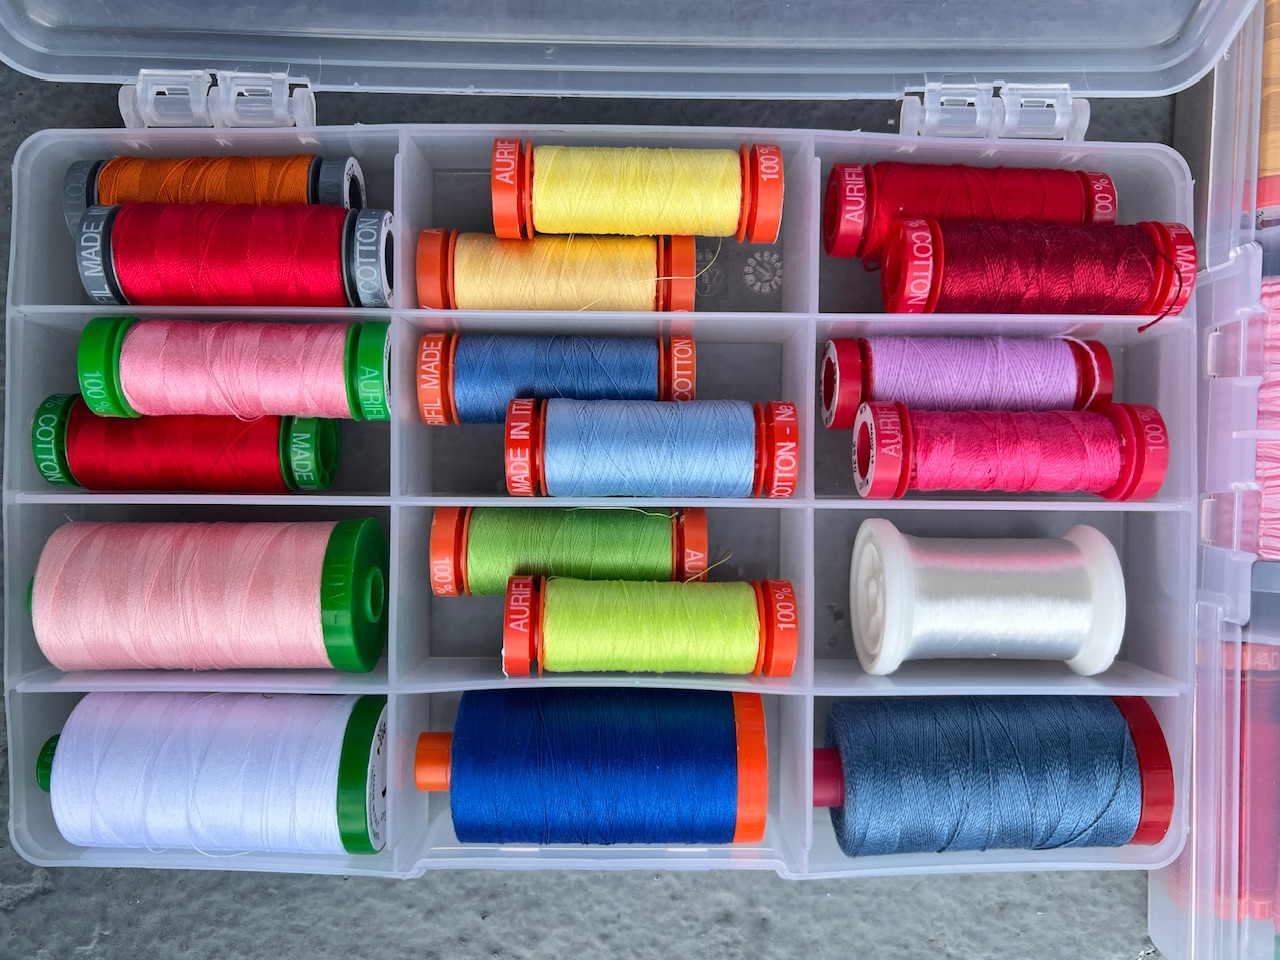
I rummaged through my fabric scraps to find something special to make my scissor cover from.  The subtle color of thread 2420 Light Blush, 2930 Golden Toast and 2840 Loden Green are three of the 20 that will be for sale debuting at QuiltCon next month in partner with Suzy Quilts and her evolve collection. 


The tie dye velvet scraps that I had picked up along the way, (probably from a guild destash event) fit the task nicely.  With the thickness of the 8 wt thread, I was pretty confident that my stitches wouldn't get lost in the texture of the fabric and was right. 


My original plan was to cut two pieces of velvet using a hand drafted paper template for the front and back.  I forgot to reverse the orientation and ended up with two fronts instead.  Digging deep into my stash I came up with a tan faux leather, for the lining I chose a loose weave and included bamboo/silk batting. 


I also chose to hand stitch with an organic free form approach, changing thread color, style and direction as I went along by letting myself be influenced by the design of the velvet.  For the construction of the front and back by machine I used 2315 Shell 40 wt and after turning the parts right side out, I used 80 wt by hand to close the opening.  


Golden Toast blended well and reminded me a bit of book binding.  For my first cover I kept to the woven lining shown above but on the second you can see below that I embraced the holes and indents created from the needle as adding more texture. Another difference is that I left out the batting, used two of the three thread colors on the front and didn't line the backing, a green faux leather.


For the snap of the first cover I had to use the stitch on style because if was an afterthought and I'd already turned and closed up my seams.  An advantage of doing another version was that I could use the prong style snap and I like the way the pearl shows off in the back.  

The 8 wt thread was surprisingly easy to work with even through multiple layers.  Although I did try using a doubled strand of Loden Green, I preferred the look of a single strand for this project.  The weight is so nicely visible that it works well in a more minimalistic design. I'm definitely a big fan and look forward to using the other colors in the future. 

Friday, December 22, 2023

Beginner Friendly Quilted Bucket Tutorial


For our December Aurifil Artisan challenge I chose to make a couple of quilted buckets. Having sewn similar from thread catcher patterns and online tutorials, my goal was to end up with ones that served the same purpose and were visually pleasing but constructed with simplified steps - omitting my dreaded tasks and adding in my most favorites. 


The quilting itself can be elaborate like the blue example, straight line stitching like the floral or anything else the maker feels comfortable doing.   Because the fabric bucket can be used for whatever you want - the measurements are only a guideline.  You can use any rectangle size you prefer.  

The front and back are the same size and the bottom is a 2" strip the same as your width.  These were cut two @ 6.5"x8.5" and one @ 2"x8.5" then sewn together as shown below.  Measure the size of the newly sewn rectangle unit and jot this number down to refer to when it's time to cut your lining. My example measures 14" once stitched. 


Keep in mind that the sides and bottom will wrap so you'll want to avoid positioning your favorite part of the fabric near those edges.  

Fold your sewn rectangle unit in half right sides together and stitch the sides as shown below.  Next, using a ruler mark a 1 1/2" square using the bottom fold line and the side stitch line then cut with scissors. 
Right sides together, fold to line up the side seem in the center and sew the raw edges from the cut out portion together.  *edited to include a step by step visual mosaic for boxing the bottom. There are a lot of video tutorials available that you can search and refer to as well. 


Repeat on the other side to form a boxed bottom.  Turn the bucket exterior right side out as shown below   


Including a bottom strip may seem like an unnecessary extra step but it not only allows you to orient directional print correctly but it also helps create a flat stable base.


I had originally picked the honeycomb fabric but felt it was too bold and graphic so I auditioned more from my stash and was happy with the dustier palette and organic scallops instead. 


Depending on how much of the lining you would like to show as the top accent, take the measurement that you jotted down from the exterior sewn rectangle and add about 1" to 1.5" to the longest.  In my example the exterior was 14"x8.5" so I cut my lining 15.5"x8.5".  Note that the width remains unchanged.


Construct your lining in a similar way by sewing the sides, cutting the 1 1/2" squares from the bottom and boxing it.  A couple of things are different for the lining: You leave it wrong side out and you fold and press the top down 1/4" and then again to meet the exterior. 


Set the lining inside and fiddle with the amount of fold until it rests flush.  If the amount of fabric showing is more than you like, simply refold the 1/4" raw edge fold more to reduce the visible accent rim.  This flexibility to easily alter the look and have a forgiving fit is the way I like to work.


Machine stitch around the top to secure the lining.  You can see that I sewed close to the edges and through the middle of the lines but you can include as many passes as you like to make the top even more structured.  I used 2930 Golden Toast 50wt for piecing and 40wt for topstitching. 


An alternative to topstitching multiple lines by machine is to hand sew with 12wt.  I love the look and texture it gives the rim of the floral bucket and think the treatment compliments the 40/3 wt channel stitching well.


This method is also more beginner friendly for those who struggle with aligning topstitching by machine.   I like not having to leave a side seam open for turning that needs to be sewn closed after like commonly done in other patterns.  


Fabric and batting scraps are perfect for this project and they make great gifts.  Even though similar quilted buckets are marketed as thread catchers for quilters, they come in handy for storing lots of other things too. 


Timing was perfect for these two projects.  I was able to complete both despite the busy holiday season and gift them to my swap partners without the stress of complicated construction.  Pairing fabrics and thread to personalize them for the recipients is where I'd rather focus my creative energy. 

Aurifil Threads : 
2930 Golden Toast 40 wt and 50 wt 
2715  Robins Egg Blue Fory/3 wt
2250 Red 12wt 
5020 Light Military Green Forty/3 wt